For a lot of us, the constant summer battle against mold and mildew in the bathroom is winding down as colder temperatures bring lower humidity levels. Regularly scrubbing down the shower walls and areas around the bathtub eliminate the dark visible signs of these menaces. But you probably don’t realize (and most likely don’t want to know) that mold and mildew build up on the usually wet underside of the bathroom faucet aerators where you can’t see it.
If you have not cleaned the aerator before, now is a good time to get rid of the summer’s mold and mildew growth. If you are lucky, you can unscrew the aerator from the faucet using only your fingers. Keep in mind that when looking from above, turning the aerator clockwise loosens it. If it won’t budge, try using a rubber pad that would normally be used for opening the metal lids of glass jars. You could also try duct tape. Also, use tape around the aerator if you want to try using pliers. Do not try too hard with pliers or you will ruin the aerator and possibly the faucet.
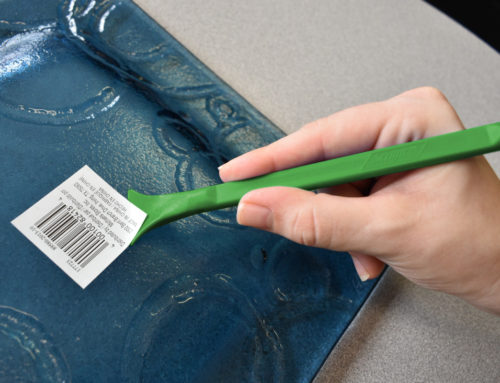
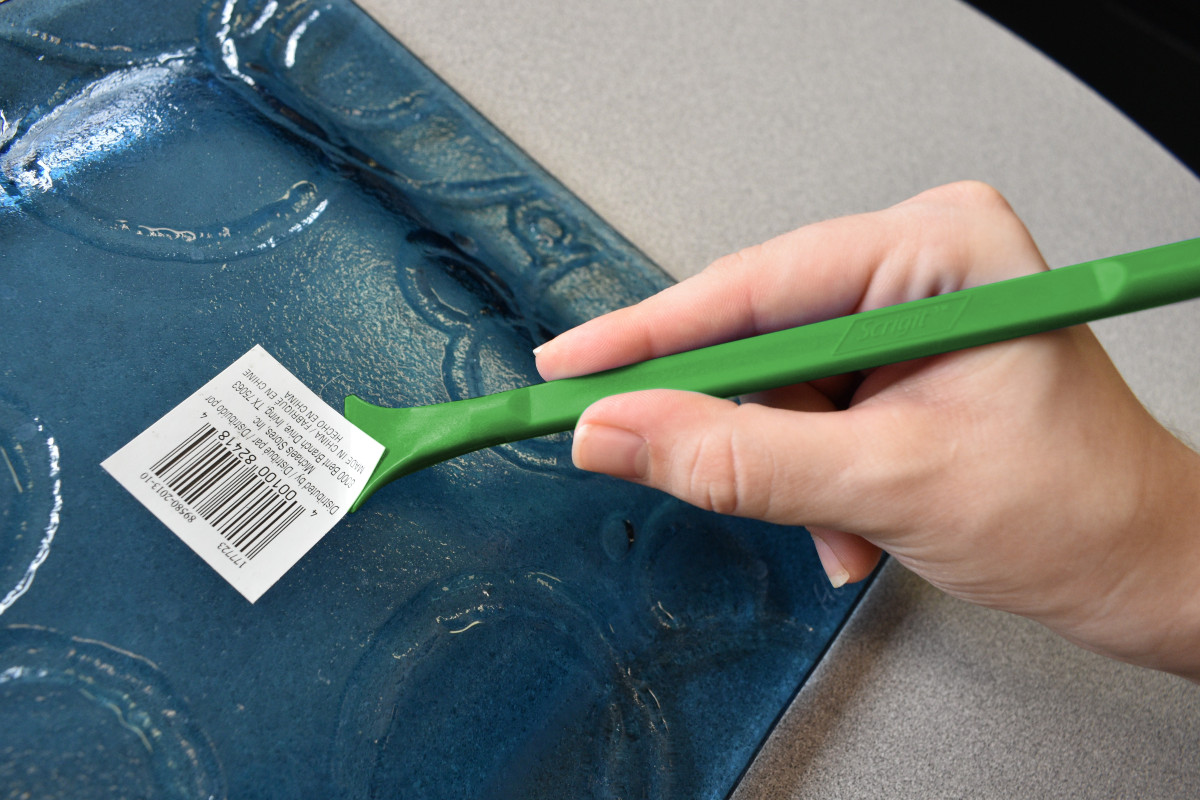
Be careful when removing the aerator because it typically consists of multiple parts. Each brand has different mix of parts, and they all must be kept in their original positions. Close the stopper in the sink or cover the opening with a wet wash cloth to keep these parts from falling down the drain. Check with your little finger to make sure none of the parts are left in the faucet. Put the aerator in a small cup, such as a leftover cup that comes with liquid cough medicine, and fill it with a mixture of 50% regular white vinegar and 50% water so the aerator is completely covered. Let this soak for about an hour or two. The vinegar not only will kill off the mold and mildew, but it will also dissolve the minerals that create a crusty appearance. After soaking for at least an hour, check the aerator and use a Scrigit Scraper cleaning tool to remove the stringy black gunk and the softened minerals. The Scrigit Scraper will not scratch the metal surface of the aerator. If the minerals won’t scrape off easily, then put the aerator back in the vinegar solution and try again later. Use water to rinse off the aerator before putting it back on the faucet. But remember if you are using the faucet with the aerator removed, turn the water on at a very low flow to keep the water from going off in all directions.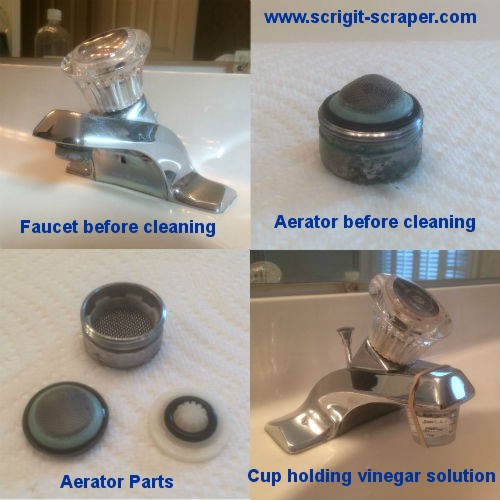
If you can’t remove the aerator, then fill the small cup to the top with the vinegar and water solution and slowly place the cup under the faucet so the aerator is submerged in the water. Use a rubber band, as shown in the photo, or tape to hold the cup in place for the hour or two of soaking time. For some faucets, you might be able to place the vinegar solution in a plastic bag instead of a cup, but a bag did not work for the style faucet shown in the photos. Use some combination of a Scrigit Scraper, non-scratch scrubber sponge, and wet rag to clean off the black gunk and softened minerals from the bottom of the attached aerator. Turn on the water to rinse everything out.
In the future, clean the aerator at least once per month. The vinegar will win the battle against mold and mildew along with keeping minerals from building up. An added benefit is that removing the aerator on a regular basis will keep it from becoming stuck in place.


Leave A Comment